
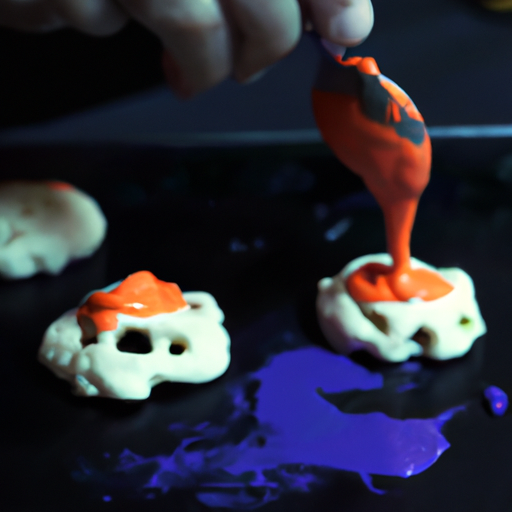
“Spooktacular Homemade Halloween Treats!”
Spooky Spider Cookies
Halloween is just around the corner, and what better way to celebrate than by making some spooky treats at home? If you’re looking for a fun and delicious treat that will impress your friends and family, look no further than these Spooky Spider Cookies. Not only are they easy to make, but they are also guaranteed to bring a smile to everyone’s face – or maybe a scream!
To start off, gather all the ingredients you’ll need. You’ll need some basic cookie dough, which you can either make from scratch or buy pre-made from the store. Don’t worry, we won’t judge if you take the easy route! You’ll also need some chocolate chips, black licorice, and some candy eyes. Now, let’s get started on creating these creepy crawlies!
First, preheat your oven to the temperature specified on your cookie dough package. While the oven is heating up, take a small portion of the dough and roll it into a ball. This will be the body of your spider. Place the dough balls onto a baking sheet, making sure to leave enough space between them for the cookies to spread.
Now comes the fun part – adding the spider legs! Take your black licorice and cut it into small pieces, about 1 inch long. Carefully insert four pieces into each side of the dough ball, creating the spider’s legs. Don’t worry if they look a little wonky – spiders aren’t known for their perfect symmetry!
Once you’ve added the legs, it’s time to give your spiders some eyes. Take a couple of candy eyes and press them gently into the dough, near the front of the spider’s body. This will give them a cute (or creepy) little face. If you don’t have candy eyes, you can also use small chocolate chips or even raisins – get creative!
Now that your spiders are all assembled, it’s time to bake them in the oven. Follow the baking instructions on your cookie dough package, but keep an eye on them as they bake. You want the cookies to be golden brown around the edges but still soft in the center. This will ensure that they are deliciously chewy and not too crispy.
Once your cookies are done baking, remove them from the oven and let them cool on a wire rack. As they cool, the chocolate chips will harden, giving your spiders a spooky appearance. Once they are completely cooled, it’s time to enjoy your creepy creations!
These Spooky Spider Cookies are perfect for Halloween parties or just as a fun treat to enjoy with your family. They are sure to be a hit with kids and adults alike. Plus, they make for a great conversation starter – who wouldn’t want to talk about the time they ate a spider?
So, this Halloween, skip the store-bought treats and try your hand at making these Spooky Spider Cookies. They are easy, delicious, and guaranteed to bring a smile (or a scream) to everyone’s face. Just be prepared for the compliments and requests for the recipe – you’ll be known as the ultimate Halloween baker in no time!
Homemade Candy Apples

Halloween is just around the corner, and that means it’s time to start thinking about all the delicious treats you can make at home. One classic Halloween treat that never fails to delight is homemade candy apples. Sure, you could buy them at the store, but where’s the fun in that? Plus, making them yourself allows you to get creative and add your own personal touch. So, grab your apron and let’s get started!
Now, making candy apples may seem like a daunting task, but fear not! It’s actually quite simple. All you need are a few basic ingredients and a little bit of patience. First, you’ll need some apples. Granny Smith apples are the traditional choice, but feel free to use whatever variety you prefer. Just make sure they’re firm and not too ripe.
Next, you’ll need some sugar, corn syrup, water, and food coloring. Yes, food coloring. We’re going for a spooky effect here, so don’t be afraid to get creative with your colors. Purple, green, and black are all great choices. Just be sure to use gel food coloring, as the liquid kind won’t give you the vibrant colors you’re looking for.
Now, let’s talk about the candy coating. You can use store-bought caramel if you want to keep things simple, but where’s the fun in that? Instead, why not make your own caramel from scratch? It’s not as hard as it sounds, I promise. Just melt some butter in a saucepan, add some brown sugar and corn syrup, and let it simmer until it reaches the desired consistency. And don’t forget to add a pinch of salt for that perfect sweet and salty combination.
Once your caramel is ready, it’s time to dip those apples. But before you do, make sure to wash and dry them thoroughly. This will help the caramel stick better. Now, take a skewer or a popsicle stick and insert it into the top of each apple. This will make them easier to handle and eat later on.
Now comes the fun part – dipping the apples into the caramel. Hold each apple by the stick and carefully dip it into the caramel, making sure to coat it evenly. You can twirl the apple around a bit to help the excess caramel drip off. Once coated, place the apple on a parchment-lined baking sheet and let it cool completely. If you want to add some extra flair, you can drizzle melted chocolate or sprinkle crushed nuts on top before the caramel sets.
And there you have it – homemade candy apples that are sure to impress all your Halloween party guests. Just be warned, they may not last long once they’re out on the table. But hey, that’s just a sign that you did a great job, right?
So, this Halloween, skip the store-bought treats and try your hand at making homemade candy apples. Not only will you have a blast in the kitchen, but you’ll also have a delicious and festive treat to share with your friends and family. Plus, you’ll earn major bragging rights for your culinary skills. So go ahead, get creative, and let your inner candy apple artist shine!
Pumpkin-shaped Rice Krispie Treats
Halloween is just around the corner, and that means it’s time to start thinking about all the delicious treats you can make at home. Sure, you could go to the store and buy a bag of candy, but where’s the fun in that? This year, why not try your hand at making some pumpkin-shaped Rice Krispie treats? Not only are they easy to make, but they’re also a great way to get into the Halloween spirit.
To start, gather all your ingredients. You’ll need a box of Rice Krispies cereal, a bag of marshmallows, some butter, and a few drops of orange food coloring. Oh, and don’t forget the green M&M’s for the pumpkin stems! Now, let’s get cooking.
First, melt the butter in a large saucepan over low heat. Once it’s melted, add in the marshmallows and stir until they’re completely melted and smooth. This is where the magic happens – the marshmallows are what give the Rice Krispie treats their gooey, delicious texture.
Next, remove the saucepan from the heat and add in a few drops of orange food coloring. You can add as much or as little as you like, depending on how vibrant you want your pumpkins to be. Stir the food coloring into the marshmallow mixture until it’s evenly distributed.
Now it’s time to add the Rice Krispies cereal. Pour it into the saucepan and stir until all the cereal is coated in the marshmallow mixture. This is where things can get a little messy, so be prepared. You might want to have a damp cloth nearby to wipe up any sticky fingers or spills.
Once the cereal is fully coated, it’s time to shape your treats into pumpkins. Take a handful of the mixture and roll it into a ball. Then, using your hands, shape it into a pumpkin shape. Don’t worry if they’re not perfect – the imperfections just add to the charm.
Now, here’s where the fun part comes in. Take a green M&M and press it into the top of each pumpkin to create the stem. You can also use a small piece of green licorice or a pretzel stick if you prefer. Get creative and have fun with it!
Once you’ve shaped all your treats, place them on a baking sheet lined with wax paper and let them cool for about 30 minutes. This will give them time to set and firm up. After that, they’re ready to be enjoyed!
These pumpkin-shaped Rice Krispie treats are not only delicious, but they’re also a great way to get into the Halloween spirit. Whether you’re making them for a party or just for yourself, they’re sure to be a hit. So, put on your apron, grab your ingredients, and get ready to have some fun in the kitchen. Happy Halloween!
